
IA Modules eCommerce Documentation
Creating Product Variations
This section covers what variations are and how to work with them both in QB POS or QB FS.
What are product variations?
Product variations are when you have items that you want to show together somehow which are different sizes, materials or otherwise some how different versions of each other. The steps to set them up for QBPOS and QBFS are different. Once setup as described below, your next step is to decide how to display the variations to shoppers. Think of variations as a list of items. A common approach is to show that list of items as a single item but with a drop down select list showing a shopper the different variations available. They could also be shown as a vertical or horizontal list of images, or anything else yo ucan think of. It is typical to at least show in a drop down how one item is different from the next version, like green/red/blue, but it is also common to show more information, like the price, and stock status. It is up to you what is shown so let your designer know what you want.
How do I configure the items in Quickbooks Point of Sale?
For QuickBooks Point of Sale, product variations are setup in your IAM Store automatically. You can disregard any of the variation setup steps discussed in the QB Financial section below. The store keys on the same thing QBPOS keys on to determine variations, ie the Desc1 field. If you have multiple items in QBPOS they need to have the same Desc1 field value to be variations of one another. Thus, if you configure your items to be variations in QBPOS, they will automatically be setup and maintained in your store and there is nothing you need to do. Simply be sure to categorize all your items of a given style in your store for it to work. From a design layout perspective, you will need to note to your designer that you wish to show variations, and how you want to show them, and what you want to show about them in various templates. Also note that the lowest numbered item in QBPOS will be the item we call the 'parent'. this is the item whose fields will be automatically trickled into it's other variations if those fields are blank. This is a wonderful feature for you to take advantage of as it will save you time. For example, you may want to provide a long description and several bullet points of information about a black shirt, and you may find that the long description and bullet points of the black shirt, whether it is small, medium, large, etc are all the same. in this case, simply enter this info for the lowest numbered item and the other items of that style (as QBPOS manual calls it or variation set as we call it ) will simply inherit those values, saving you a ton of time and leading to higher consistency.
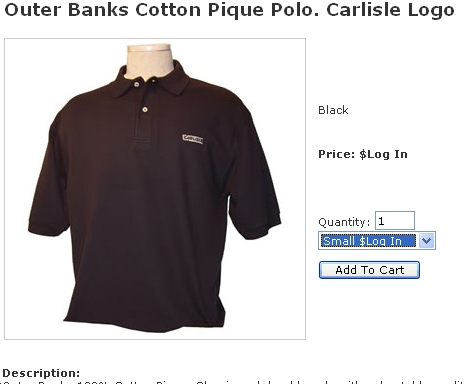
Example: If you sell black shirts you probably have several variations of the same shirt (ex. small, medium, large, and extra large shirts). These 4 items may have different prices, but probably share a common image and description. |
How do I configure the items in Quickbooks Financial Pro, Premier, Enterprise?
NEW: Variation Wizard for QB Financial makes quick work of variation setup!
Now in version 6.5 the variation wizard can spare you the need for many (possibly all) steps below. You still have to create a item in QB for each version, however, if you name them in a similar and logic way here's what happens: Make items in QB like Guess-1033-Black-Small and Guess-1033-Black-Medium. Come to the new Variation Manager Wizard and define a new style set. Call it 'Guess-1033-Black' for example. give it some basic details. At this point the wizard will guess all items starting with a name like 'Guess-1033-Black' belong in this set and with one click, you can assign them. Then you will see all the commonly edited fields exposed to you for all the items right in one screen.
Read below for a more detailed understanding if you wish. You'll see that thanks to this new wizard, you DO NOT have to make a 'parent item' in QB nor go through multiple tedious steps. This new wizard does in seconds what took minutes before.Read on if you want to know the details of the old & more work intensive way....
Creating product variations is a way of creating a parent-child relationship where a parent item is used to represent multiple child items that have similar attributes. When you create a product variation, you can choose for your customers to see only the parent item in your category listings. They can select the parent item from the category listings and arrive at the product detail page, where they would then choose the specific variation to add to their cart.
To configure QuickBooks™ for variations, you would
need to have each of the possible variations in
QuickBooks™. In the example above, this
means
QuickBooks™ should have 4 existing items
(small black polo, medium black polo, large black polo, and x-large black polo).
Then you will need to create an item in QuickBooks™ that represents all of these variations. This will act as a parent item in
QuickBooks™, so it will need a generic name to represent all the variation items that will be related to it. It should be a non inventory item. Finally, before it can be used, the syncronization program must perform a synch so that the object is replicated to the online storefront.
How do I configure the items in the online storefront?
After the parent and child items have been created in Quickbooks and have been synchronized to the online storefont, you may configure how you want them to be displayed on your site. You will need to login to the administrative interface for your online store and categorize the parent items.
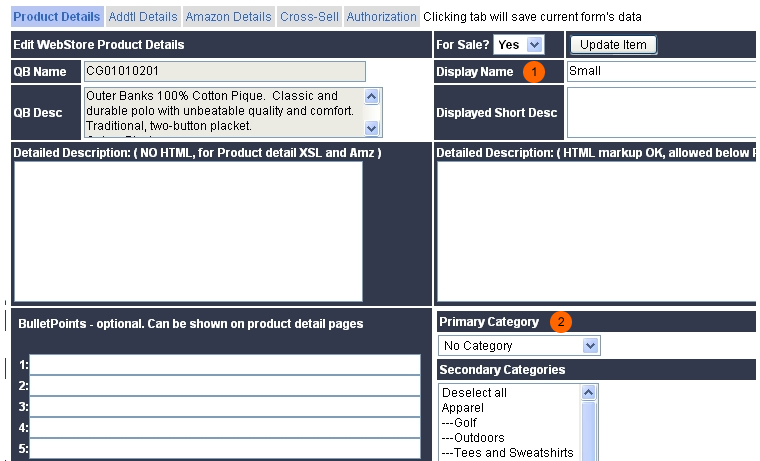
Once you have logged in to the administrative interface, click on the "Admin" tab, and select "Item Manager" from the left hand menu. Then click on one of the child items in the list. You will be setting 4 values.
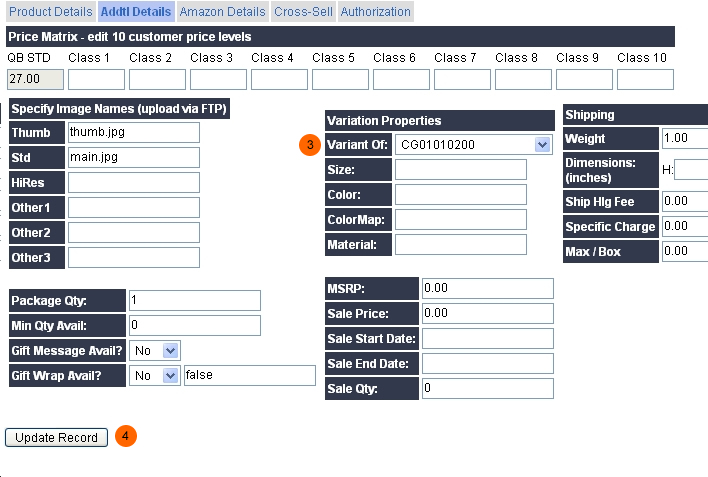
1. For each child item, set the display name. This should only contain the words that differentiate the child item from the parent item. (Small) 2. Choose if you want this item to show up in the category listings. In the example above, you would only want the parent to have a category, so you would choose "No Category" for each child item. 3. Click on the Additional Details tab, and set the "Variant Of" value to the parent item. 4. Click "Update Record" to record the changes.
|
How can I customize the way my variants are displayed?
You can customize the HTML output for the variant items. For example, if you want to display radio buttons instead of a dropdown menu, or display thumbnail images for each variant, you can edit the XSL file and change the embedded HTML code. See the design guide for more information. If you are not comfortable editting HTML code you can get an IA Modules web designer to assist you.
All rights reserved.